Can Copic Draw Over Black Paper
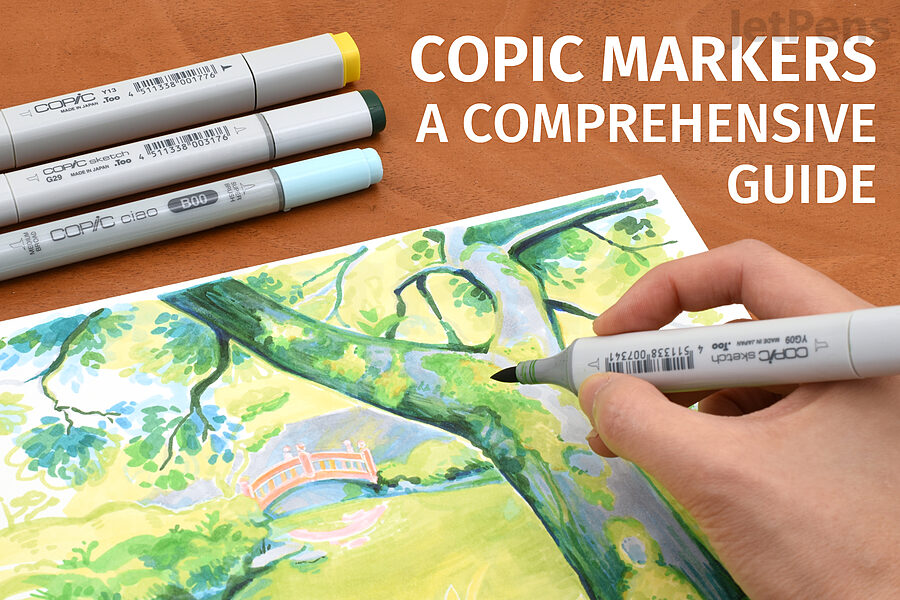
If you're an art enthusiast, you've undoubtedly heard of Copic markers. Copic markers come in an awe-inspiring range of colors that layer to create luminous, professional art. Plus, they're refillable, so you'll never need to cull dried-up markers out of your collection. Read on to learn about the different types of Copic markers, the best paper and pens to use with them, drawing techniques, and more.
Anatomy of a Copic Marker
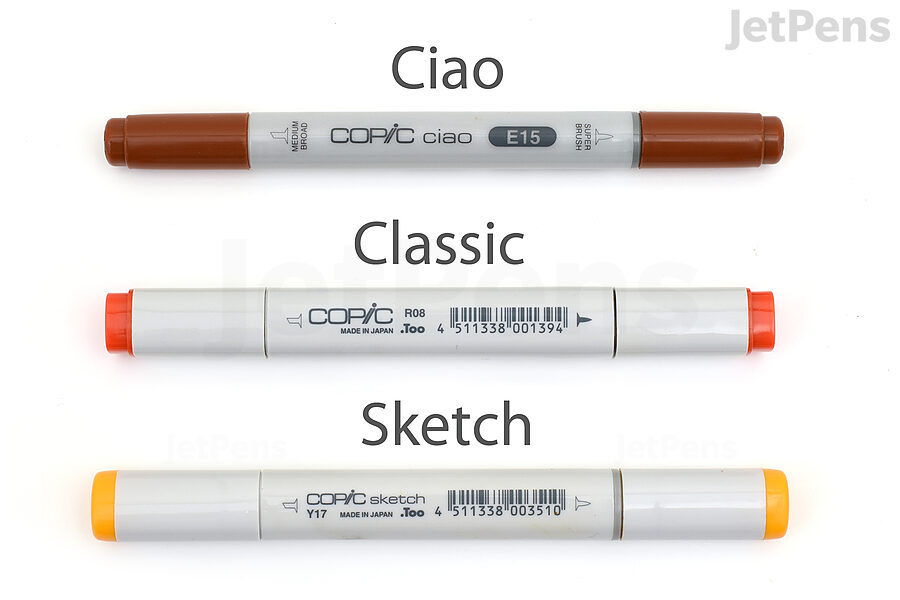
Copic markers come in three varieties: Ciao Markers, Classic Markers, and Sketch Markers. They all contain the same alcohol-based ink, but differ in color range and price. Classic markers have the greatest ink capacity. Ciao markers, the most affordable option, are only available in sets of six. Sketch markers come in the widest color range and can be purchased individually.
Markings
Markings on the right side of each Copic in this picture distinguish finer-tipped nibs.
All Copic markers are double-ended. The dark gray line around one tip of the Ciao and Sketch markers identifies the brush nib. To find the bullet nib on the Classic, read the smaller marking labels or look for the slightly darker line around the bullet nib's cap.
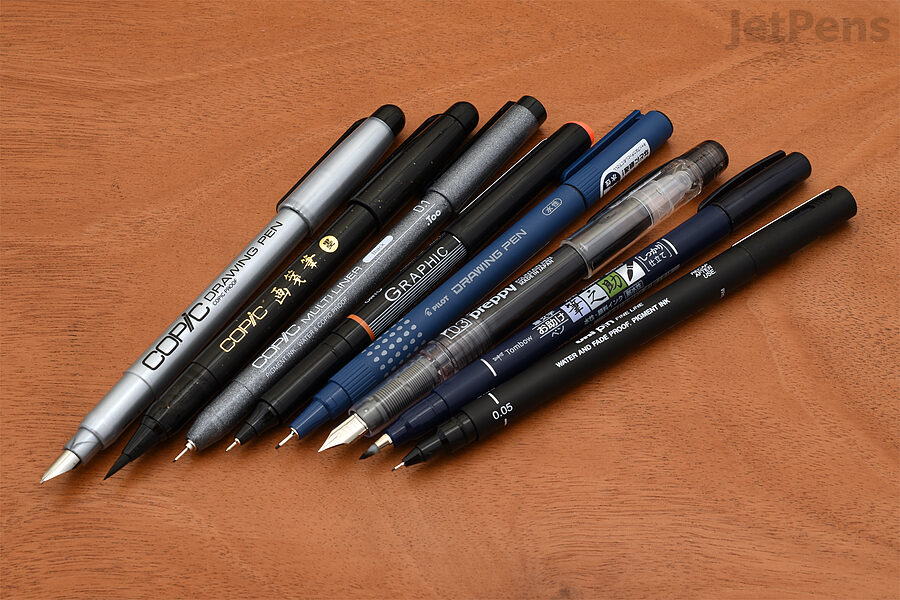
Nibs
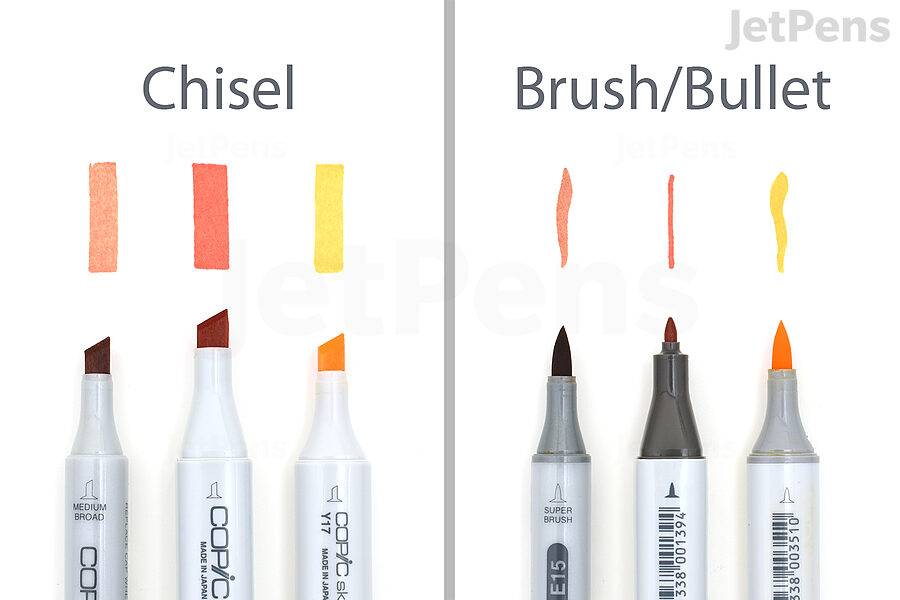
The default Copic nibs for Ciao, Classic, and Sketch markers.
The Ciao and the Sketch both have a Medium Broad chisel nib on one end and a Super Brush nib on the other, while the Classic pairs a Broad chisel nib with a Fine bullet nib.
The Super Brush nibs shine when blending and creating organic lines, while chisel nibs excel at filling in large areas of color. The bullet nib of the Classic creates fixed-width fine lines that can be used for hatching or crosshatching textures.
Shape and Size

Each type of Copic has a different form factor.
Each type of Copic has a distinctive profile. The Ciao is round (with a small nub on each cap to prevent rolling), the Classic is a rounded square, and the Sketch is an oval with flattened sides.
The size difference between Copics affects the amount of ink they hold and how long a marker can go between refills; the Classic holds the most ink and the Ciao the least.
Cap Labeling

The label on a Copic cap describes color family, saturation, and value.
The mysterious letters and numbers on the cap of a Copic describe that marker's place in the Copic Color System.1 The first letter (or letters) indicates the color family: R for red, Y for yellow, E for earth-toned, and so on.
Colors that belong to multiple families are marked with multiple letters. The first number indicates saturation and vibrancy. The lower the number, the more vibrant the color.
The second number indicates value, also known as the lightness or darkness of a color. The lower the number, the lighter the color.
The Copic Color System helps you compare the markers you own with ones you might purchase, making it easy to fill gaps in your collection.
Refillable

A refill extends the lifespan of a Copic marker.
All Copic markers are refillable. Refills contain 12 ml of ink, enough to fill a Classic Marker more than 4 times, a Sketch Marker more than 6 times, and a Ciao Marker more than 8 times. We explain how to refill your Copic markers later in this guide.
Drawing with Copic Markers
Before you start to draw, make sure you're working with the right paper and, if you're outlining your art, the right pens.

We highly recommend the Strathmore 400 Series Marker Pad. Its smooth paper makes blending almost effortless. Unlike almost every other options we tested, ink did not feather—lines stayed exactly where we put them.
For a more portable option, pick up a Copic Wirebound Sketchbook. Its pages are smooth and fairly bleedthrough resistant. It's available in two sizes, 5" x 7" and 4" x 4", which can both be easily tucked into a bag. We found blending in Copic sketchbooks to be ever-so-slightly more streaky than in the Strathmore, but it's hard to notice anywhere besides large areas of flat color.
Smooth, nonabsorbent paper is key when working with Copics. Absorbent surfaces like copy paper and many mixed media sketchbooks will suck up ink, resulting in streaks and harsh divisions between areas of color. Blending marker ink is easier when it remains wet for longer, and when paper is fully saturated, layers of ink on its surface can be manipulated to create interesting effects.
Heavy layering will cause bleedthrough even on the high-quality mediumweight pages of the Strathmore. Keep a bit of scrap paper between pages, or remove a sheet from the sketchbook and work on a surface you can later clean with rubbing alcohol.
The Best Inking Pens for Copic Markers
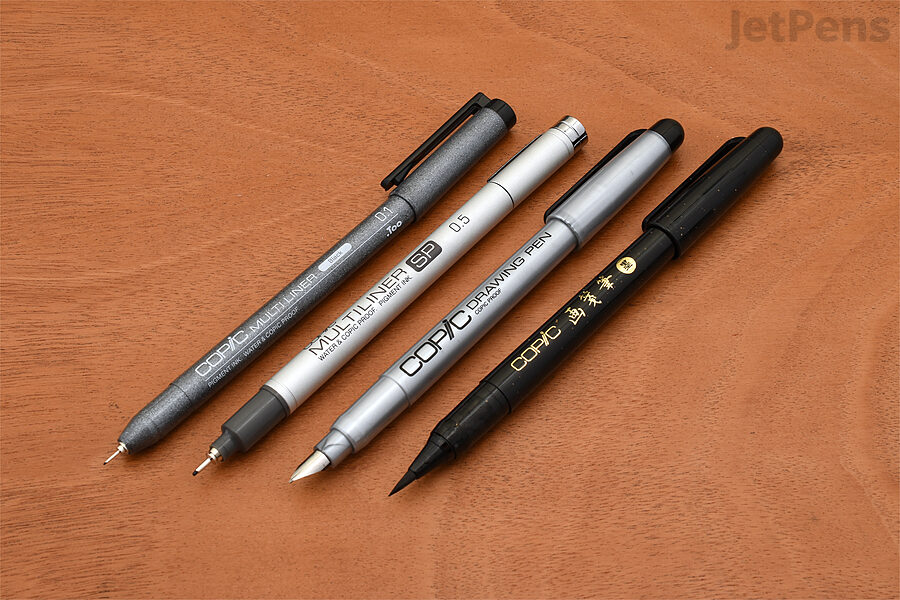
Some inks can smear when colored over with Copics. Luckily, Copic has thought ahead and created pens compatible with their markers. Their Multiliner Pens and Multiliner SP Pens are fineliners available in a range of tip sizes. Multiliners come in jewel-toned and neutral colors. Multiliner SP pens are available only in black, but can be refilled as well as refreshed with replacement nibs.
Copic Comic Drawing Pens have stainless steel nibs for precise yet artful lines, and for those who like a little more life in their inking, the swishy tip of the Copic Gasenfude Nylon Brush Pen provides great line width variation.
If you want to explore multiple options at once, our Copic-Proof Pen Sampler offers a range of fineliners, brush pens, and even fountain pens for you to experiment with. It includes three out of four of the pens mentioned above, omitting only the Multiliner SP.
For other Copic-proof options, many of our guides evaluate pens by Copic compatibility. The Best Fineliner Pens recommends the classic Sakura Pigma Micron Pen, available in precise tip sizes and a wide range of colors. The Best Manga and Comic Art Supplies lauds the Pentel Pocket Brush Pen. It's waterproof, erase-resistant, and refillable, so you can maintain it for as long as you keep your Copics.
How to Select Copic Marker Colors

The simplest way to learn if Copics are right for you is to buy gray markers and learn the basics of blending and developing light and dark. Copic Classic markers are available in gray sets, but you can also pick up a few gray Copic Sketch markers. Selecting some warm grays and cool grays is a great way to start experimenting with color temperature.
However, we know colors are the fun part! Selecting colors depends on the kind of art you want to make. We recommend that you avoid buying exclusively dark, vivid colors. They may be exciting, but they will make it very hard to create an interesting play of light and dark in your piece.
The larger sets of Copics have a great selection of bright colors and neutral tones, but you can also pick up a smaller set and a few additional neutrals that will extend the range of those primary colors. For easy, subtle shading, pick up a pale blue or a light purple. We recommend blue or purple because warm light like sunlight casts cool shadows. A pale gray or beige can be used to tone down brighter colors, and a light yellow or pink can add a lively glow.
Drawing Techniques for Copic Markers
Copics can be intimidating, but once you're prepared with the right tools, Copic marker art is nothing but fun.

Starting Your Drawing
We recommend starting your drawing with light colors and slowly building in layers, working up to darker values. This approach is great if you're sketching or experimenting as you go.
Alternatively, start with the darkest colors in your composition. Colors can easily become darker than intended when layering, and lightening them requires a colorless blender or mixed media touches. This technique encourages you to take care.

Layering
Layering gives Copic art its luminous feel. It's an essential step in any drawing, whether creating areas of flat color, adding shading, or blending between two hues.
As we mentioned, layering a color makes it darker. This is true even when it's layered over itself. As you can see above, layering light yellow over blue creates combinations that are darker than both. Smooth blending, achieved by switching between markers quickly and mixing ink while it's still wet on the page, often takes many layers of both colors. Keep this in mind when planning your drawing.

Test Swatching
Swatch color choices on scrap paper before adding them to your drawing. The color of the cap and the color of the ink don't always exactly match, and testing your colors makes tricky layering combinations more likely to succeed.

Colorless Blender
The colorless blender marker is better understood as a diluter to lighten colors or lift where you've gotten ink outside the lines. You don't need it to successfully mix two colors together.

Multi-Media Texture
Add texture to your piece with mixed media touches, such as those made by colored pencils or white gel pens like the Uni-ball Signo Broad.

Preserving Your Drawing
Over time, Copics may fade. They were first invented for fast sketching in design jobs such as manga, architecture, and fashion. The best way to preserve your Copic art is scanning it digitally. If you plan to display your pieces, spray them with a UV protectant or keep them under UV-filtering glass.
How to Refill and Maintain Copic Markers
While Copic markers require a notable initial investment, their ingenious design means you'll never need to re-buy one.
Replacing the Nibs of Copic Markers

Replacing or swapping nibs takes only a minute or two, and the most time-intensive step is waiting for the ink to soak through the replacement. Start by grasping the base of the nib securely with Copic tweezers (or your fingers, if you don't mind ink). Keep your pen upright to prevent spills.

Then give it a firm yank. It should come right out, although we experienced more resistance from very dried-out nibs than from wet ones.

Pop the new nib in. Double check that it's fully inserted. We're replacing the Super Brush nib with a firmer Medium Round nib.

Let the pen sit for several minutes with its cap on so ink can saturate the new nib. We've left the cap off so you can see the process in action. The color might be a little inconsistent right after a nib replacement. Always test the marker on scrap paper first.
Refilling the Ink of Copic Markers
Refilling ink is slightly riskier from a staining perspective, but not much more difficult than replacing nibs. First, obtain a Copic Marker Refill in the correct color. If you would like to mix a custom color, Copic offers an empty refill bottle for blending inks. Just be aware that once your pen is filled with a custom ink, the information on its cap will stop being accurate.
Perform this process over a washable surface, preferably plastic, and have rubbing alcohol on hand to clean spills.

To refill the ink, first uncap the marker and remove the broad nib with the technique noted above. Removing both caps permits optimal airflow.

Uncap the refill and carefully insert the nozzle into the marker body. Start at a horizontal angle and then tilt once you're sure the placement of the refill is secure. Pour the ink in slowly.

You can use the ml markings on the side of the refill to check how much you're pouring in. Every refill contains 12ml of ink.
Ciao markers contain 1.4ml of ink, Sketch markers contain 1.8ml, and Classic markers contain 2.5ml. Aim for refilling a little less than that, as markers may leak if overfilled.

Once you've refilled enough, reinsert the broad nib and cap your marker. If refilling a dry marker, let it sit and slowly resaturate.
Conclusion
The many colors of Copic markers can create unique effects and breathtaking art. If you use Copics, let us know your favorite techniques in the comments, and if you don't, let us know what you would use them to draw. For more art supply recommendations, subscribe to our newsletter to see new guides and videos.
Related Posts
Can Copic Draw Over Black Paper
Source: https://www.jetpens.com/blog/Copic-Markers-A-Comprehensive-Guide/pt/585
0 Response to "Can Copic Draw Over Black Paper"
Post a Comment